
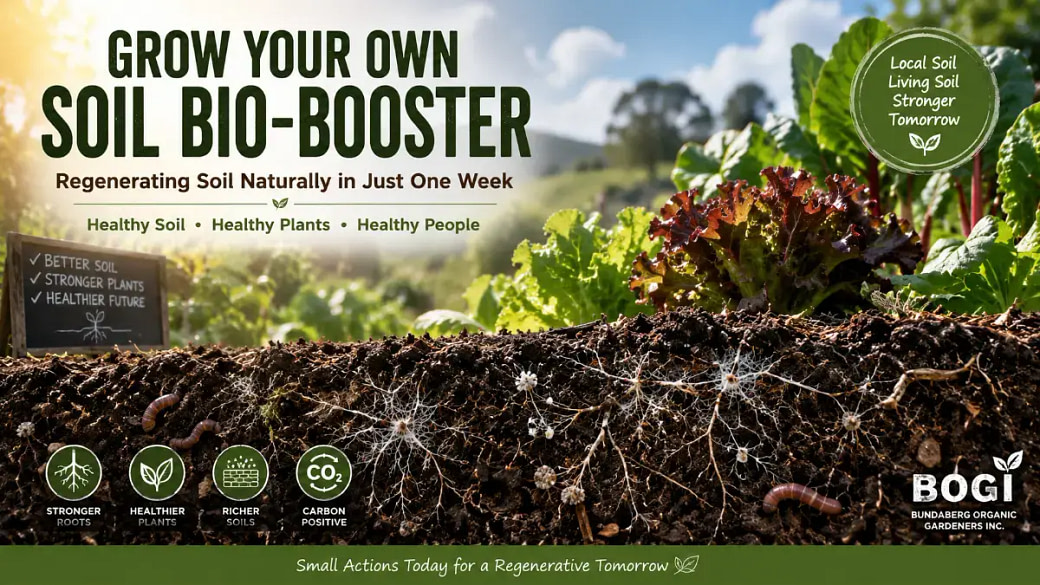
Imagine being able to produce billions of beneficial soil organisms on your own property in less than a week using inexpensive ingredients and local soil. That's the idea behind the Grow Your Own Soil Bio-Booster system.
Research and on-farm experience have shown that restoring beneficial soil biology can improve soil structure, increase plant health, enhance nutrient cycling and even contribute to carbon sequestration.
Rather than purchasing expensive microbial products, this method allows gardeners and farmers to cultivate their own diverse community of beneficial soil organisms using biology already adapted to local conditions.
Why Soil Biology Matters
Healthy soil is alive.
A single teaspoon of healthy soil contains billions of microorganisms working together to:
- build soil structure
- recycle nutrients
- feed plants naturally
- improve water infiltration
- suppress disease
- increase resilience during dry periods.
Unfortunately, cultivation, synthetic fertilisers and pesticides can greatly reduce this biological diversity.
The goal of the Soil Bio-Booster is simple:
Restore life to the soil so the soil can once again support healthy plants naturally.
Why Use Local Soil?
One of the greatest strengths of this system is that it begins with healthy local soil.
Local microorganisms have already adapted to your climate, rainfall, soils and native vegetation.
Rather than introducing a limited range of purchased microbes, this approach captures the incredible diversity already present in healthy undisturbed environments.
Suitable collection sites include:
- native bushland
- old fence lines
- beneath long-term mulch
- healthy compost areas
- creek banks
- mature gardens.
Only the top 1–2 cm beneath the mulch layer is collected because this is where biological activity is greatest.
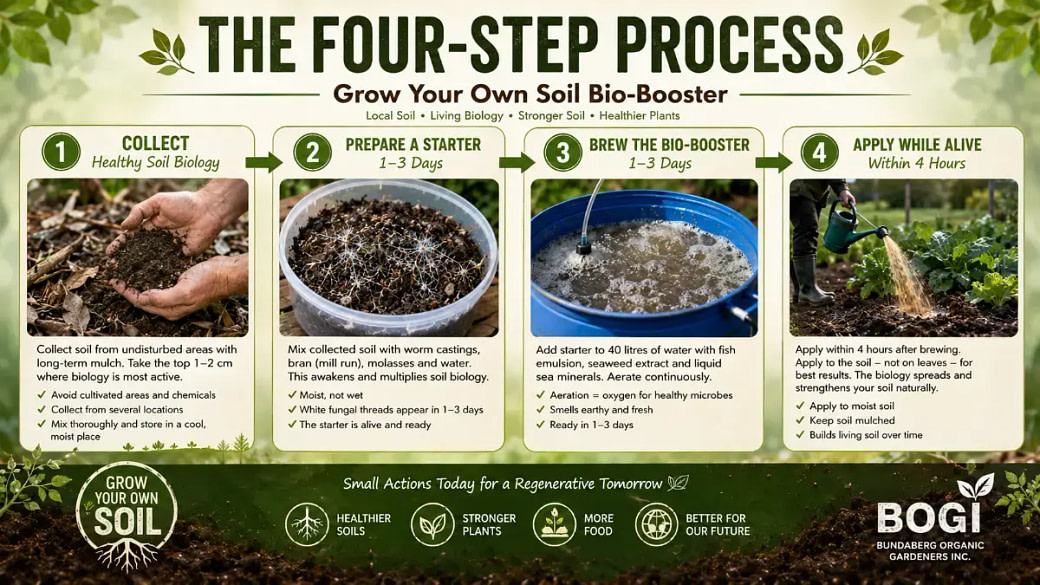
The Four-Step Process
The Soil Bio-Booster is produced in four straightforward stages.
1. Collect Healthy Soil Biology
Collect small amounts of soil from several undisturbed locations to maximise biological diversity.
2. Grow a Starter Culture
The collected soil is mixed with worm castings, bran (mill run), molasses and moisture.
Over one to three days, the fungi and beneficial microbes multiply rapidly.
The starter is ready when fine white fungal threads spread throughout the mixture.
3. Brew the Bio-Booster
The starter is then multiplied in a large volume of aerated water.
Fish emulsion, seaweed extract and liquid sea minerals provide food for the biology while continuous aeration supplies oxygen.
A healthy brew develops the pleasant earthy smell of fresh soil.
If it smells sour or rotten, unwanted anaerobic organisms have taken over and the brew should be discarded.
4. Apply While Alive
Because these organisms are living, they should be applied within a few hours after aeration stops.
Applications are most effective when placed into moist soil rather than left exposed to sunlight.
The biology then spreads naturally through the soil over the following weeks.
Why Fungal-Dominated Biology?
Healthy agricultural soils contain a balance of bacteria, fungi, protozoa and many other microorganisms.
Fungi play several particularly important roles by:
- building stable soil aggregates
- improving water infiltration
- transporting nutrients to plant roots
- storing carbon in stable organic matter
- supporting long-term soil health.
The brewing ingredients are chosen to encourage fungal development while maintaining overall biological diversity.
Why Not Just Buy Biological Products?
Commercial biological products can certainly have value.
However, many contain only a limited range of microorganisms.
Soil health specialist Jim Hoorman has described today's biological product market as something of a "Wild West", with many products available but varying greatly in quality, diversity and suitability for different soils.
Growing your own biology from healthy local soil provides a highly diverse community already adapted to local conditions.
Benefits Observed
Users of the Grow Your Own Soil Bio-Booster have reported improvements including:
- healthier root systems
- improved soil structure
- greater water-holding capacity
- increased earthworm activity
- stronger plant growth
- improved crop performance
- reduced dependence on synthetic fertilisers.
The Bio-Booster can be produced at relatively low cost using equipment already available on many farms and can also be adapted for home gardens.
A Living Soil for the Future
Healthy soils are built by biology, not simply by adding nutrients.
By restoring diverse microbial life, gardeners and farmers can begin rebuilding natural soil processes that have developed over thousands of years.
The Grow Your Own Soil Bio-Booster offers an accessible, low-cost way to encourage those processes and move towards healthier soils, healthier crops and healthier communities.
DIY on farm under 7 days & see changes in 100 days.
Researchers have shown high fungal teas may regenerate soils and fix carbon in a short time. DIY Instant Compost Tea will quickly regenerate soils and give economic, soil and crop benefits within 100 days. See below for detailed methodology and results. Just think! If all Australian farmers were using Grow Your Own Soil Bio-Booster, they could, each year, sequester more carbon than the world emits!!
Healthy Plants - Healthy People Grow Your Own Soil
Bio-Booster Introduction
Farmers and graziers have shown a boost in production when a diverse soil biology booster is applied to farming and grazing soils. The bio-booster can be grown on the property as and when needed at a low cost. This requires no major additional equipment beyond what is already there, some time to get familiar with it and very little extra money. It does require a change in mindset, awareness of the role of soil biology and willingness to look after it.
Four-step Process: The Grow Your Own Soil Biology Booster
Soil Biology Booster can be grown in four steps over 5 – 7days, whether it is for large farms or small gardens.
Step 1: Identify and collect healthy and diverse local soil biology.
Step 2: Prepare a starter – initial awakening and multiplication of soil biology – takes 1 – 3 days.
Step 3: Brewing – aerobic multiplication in water – takes 1 – 3 days. This results in the Soil BB, which is highly concentrated, diverse, living and easily applied.
Step 4: Application - apply into the soil within four hours of stopping the aeration, as it is alive and needs oxygen.
By using local, healthy and diverse and soil biology, this process produces a safe, diverse and living soil-biology that can immediately start to strengthen the symbiosis with plants. Many alternative successful methods use compost as a source of soil biology. In Australia, commercial composts are often hot composted. This may be due to regulations or lack of temperature control during preparation. Temperatures near or above 65 °C destroy soil biology. Such compost is still useful as fertiliser and feedstock for growing soil biology. There are many commercial products with a single or a very small range of soil biology species. A wide diversity of species is an essential characteristic of a healthy soil biology.
This is further discussed in Jim Hoorman’s article, “Navigating the ‘wild West’ of Biological Products” – summarised below.
Trevor Galletly, QDA, B AgSC - 40 years in biological farming Peter van Beek, Dip Agr, B Ec, M Ag studie
Navigating the ‘Wild West’ of Biological Products:
I’ve heard some people refer to biologicals as the “Wild West” of farming. Huge potential, little regulation. How do you know which ones could work on your farm? Soil health specialist and No-Till Innovator Jim Hoorman helps navigate some of the key factors to consider with biologicals.“I think farmers need to understand the different functions. We have mycorrhizal fungi; there are like 250 of those. There are maybe 34-35 that I know of that impact corn and about 30 some that affect soybeans. The hardest part with biologicals is you have to know what you’re starting out with, and you need to figure out what you need and where you get them. None of those is easy. They’re all expensive. That makes it tough. For example, we’ve got fungus, we’ve got bacteria. Something most people haven’t learned a whole lot about is Pseudomonas, and those are the ones involved in rhizophagy. If you have Pseudomonas bacteria in your soil, they’re like a double-edged sword. Under the right conditions, they help the crop to grow, but under bad conditions, they cause disease. You need the right soil to make all that work.
”https://www.no-tillfarmer.com/articles/13890-navigating-the-wild-west-of-biologicalproducts?utm_source=omail&utm_medium=email&utm_campaign=deu&utm_content=ntf&oly_enc_id=3803J5416278C3X
Step 1
Identify a Collection Site
Collect local soil biology from undisturbed areas with long-term mulches. Avoid areas that are cultivated or have had fertilizers or chemicals applied. Look under mulches, along fences, roadsides, near compost bins, maybe a friend’s garden, local creek or remnant native vegetation. The soil needs to have a surface mulch and beneath that a crumbly layer of fine mulch and crumbly soil.
Collection
Push aside the layer of dead leaves and sticks or mulch and collect the top 1 to 2cm soil, which is the layer where the biology is most active. Often, this layer will be darker than other layers.
For commercial applications, collect at least 5 litres of soil; for small areas collect at least 1L. Collect from several locations to increase the chances of complete local soil biology and then mix the samples together.
Storage:
Thoroughly mix the samples together and store in a cool and moist place. Avoid it getting waterlogged or dried out.
STEP 2 - STARTER
The starter combines local soil biology in a growing medium with foods to multiply the biology. This results in a high-fungal starter to be further massively multiplied in a large volume of water to grow the Bio-Booster. Farmers and graziers will do this to cover large areas. A 40-litre brew needs a 40-litre starter and is enough to treat up to 4,000 square metres
Mixing
- 4 L Starter for 100 L Bio-Booster for 0.4 Uniformly mix:
- 3 L worm casts from your own or a local worm farm.
- Dry compost (not potting mix) may be tested as a substitute.
- 1 L Mill Run – bran and pollard as a biological food, available at produce stores,
- 50 ml molasses - dilute in warm water for even spreading.
- 300 mL of local soil collected in Step 1. Once mixed, add water till just able to squeeze a drop of water, NO wetter.
- Squeeze until a water droplet appears
Growth Phase: 1 - 3 Days
Place the mix, 8 – 10 cm deep, in a cardboard box, in a shady place, on the ground with drainage available.
Compress it gently, like compressing soil around seedlings. Excess compaction will exclude air and stop the desirable biology from growing.
Cover with a wet cloth to maintain humidity and temperature.
Rewet the cloth in a bucket of water, wring it out and put it back over the starter twice a day. A slight warming will occur after 12 – 24 hours, which shows strong biological activity. It is important to check by hand for warming and make sure it is going well.
Check if ready to apply. It may be after 24 hours in summer or 48 hours in winter. When fungi cover the surface, check their spread throughout the starter. Break the starter from top to bottom. If you can see white or grey threads throughout the Starter, it is ready. If not, put it back and give it another day.
Key Points:
Keep the collected soil moist and cool before use.
Check by hand that there is warming about 12 – 24 hours after wetting the starter.
Keep the covering cloth damp twice a day.
Prevent the mix from getting too wet by protecting it from rain, sprinklers and hand-held hoses.
When the fungi covers the Starter, check that it has also spread through the starter.
If not, wait another 24 hours and allow to grow further.
N.B. It is strongly suggested to complete two or three small starters as per Step 2 Starter for Gardeners, to gain a feel for it and test local ingredients and conditions before undertaking a 40-litre starter for 1,000L.
Step 3: Brewing
The starter is multiplied in water with nutrients and lots of air to grow the bio-booster.
Aerated growing - Brewing
Good natural soil biology needs oxygen, so aeration of the water is necessary to get the aerobic conditions for the correct biology. An aerobic bio-booster smells ‘good’, the sweet smell of good moist soil. Anaerobic biology does not need oxygen and smells like foul, like rotten eggs or worse, and is often harmful. Check by smelling and using a microscope. Dump anaerobic brews as all biology will be killed. Check the conditions and try again.
Quantities:
Bio-booster is applied at 100L/ha plus extra water for practical distribution. Our trials used a 1,000-litre pod for a 1,000-litre GYO Soil Bio-Booster, enough for 10 ha. For smaller brews, adjust accordingly.
Equipment: Photo1 - Overview Photo 2 – Air spreader pipes 1,000-litre bio-booster requires:
Tank 1,000 L pod.
Pipes 40 mm PVC pipe, two lengths (4m).
Fittings PVC 40 mm: T pieces (2), 90o elbows (5), and end caps (3) to suit the above design.
Air pump with a large enough capacity to pump at least 1L air/1 L water /minute,
Control tap 40mm PVC between the pump and aerator.
Sieve to remove large particles and prevent blockages. We recommend using a microscope to check for the presence of fungi and other biological organisms.
Aeration:
Enough air needs to be pumped to give 2 – 8 cm boil on the water surface – a very jumpy surface. The air spreader pipes need holes facing downwards and sideways so as to give agitation across the bottom and thus minimise anaerobic dead spots.
Feeding the Biology
Multiplying biology requires food. The ingredients added during brewing favour fungal growth, which is part of the biology that builds soil structure and captures long-term carbon. Fungi need other biota as food to survive and grow.
Growing
- Mix into 1,000 L non-chlorinated water or rainwater:
- 40 litre starter
- 2 L Fish emulsion
- 4 L Seaweed Liquid
- 2 L Liquid Sea Minerals
Aerate for 24 hours in warm to hot conditions and 48 hours on cool to cold conditions. Assess development under a microscope. Apply within 3 - 4 hours after stopping aeration; biology starts dying without oxygen.
Tips:
If a starter bag is used to keep the brew free from floating solids, ensure air is supplied directly into the bag. Otherwise, this may create anaerobic conditions. A free-floating starter dispersed throughout the brew is simpler and produces just as good a brew. Clean the tank and pipes after each brew. Experience has taught that cleaning the tank and equipment while wet is easier than later. Otherwise, the biology keeps working and “glues” itself to the equipment. Don’t overfill the tank – allow 10 cm for the jumping brew. The secret to success is maintaining a very jumpy brew at all times. See the Photo Gallery for more photos of brewing and application. See Step 4 – Application to large areas
Note: As a precaution, we suggest brewing in an open space and/or using a face mask when inspecting during aeration. Not all soil fungi are human-friendly in high concentrations.
Step 4: Application
Soil biology
Soil biology may be killed by sunlight if exposed for over 15 minutes. During application, ensure that the biology is placed in the soil. The biology will grow and spread fast, so narrow spacing of application rows is not required. With adequate moisture, applications 2 metres apart have been shown to join within 100 days.
Apply GYO Soil BioBooster 100 L brew/ha.
Desirable biology foods such as: 5 L / ha Sea Minerals
3 – 10 L/ ha fish emulsion,
3 – 10 L/ha seaweed liquid
Trace elements as required - if missing, trace elements slow photosynthesis & plant growth
Transferring to the application tanks.
Once the brew has been checked by microscope and/or smells good, allow it to settle for 5 – 10minutes, then filter while transferring to a distribution tank. Ensure the tank is free of chemicals. Use a low-pressure water pump with less than 60psi, as higher pressures damage or kill the biology, e.g. PTO pump, or a 12V bilge pump.m Prevent clogging up of nozzles by screening with a very fine sieve, for instance, a midge-proof flyscreen or fine woven insect netting or a combination.
Photo 1 - Bilge pump (12V) Photo 2 - Funnel & flyscreen Photo 3 – Screen in tank
Add as much water as required to ensure that the brew is placed below the surface when injecting behind coulters, rippers or tines. Application by low-pressure irrigators is ideal.
Application by tractor Photo 6 - Brew injection & seeder Photo 7 – Brew injection behind coulter
Application by irrigation
Inject the diluted brew, sea minerals, fish emulsion and seaweed liquid into the irrigation water. Avoid high-pressure winch irrigators as biology will be killed, and trickle irrigation, as filtration may remove biology.
Photos 4 & 5 Front and rear-mounted tanks Photo 8 – Low-pressure irrigator
